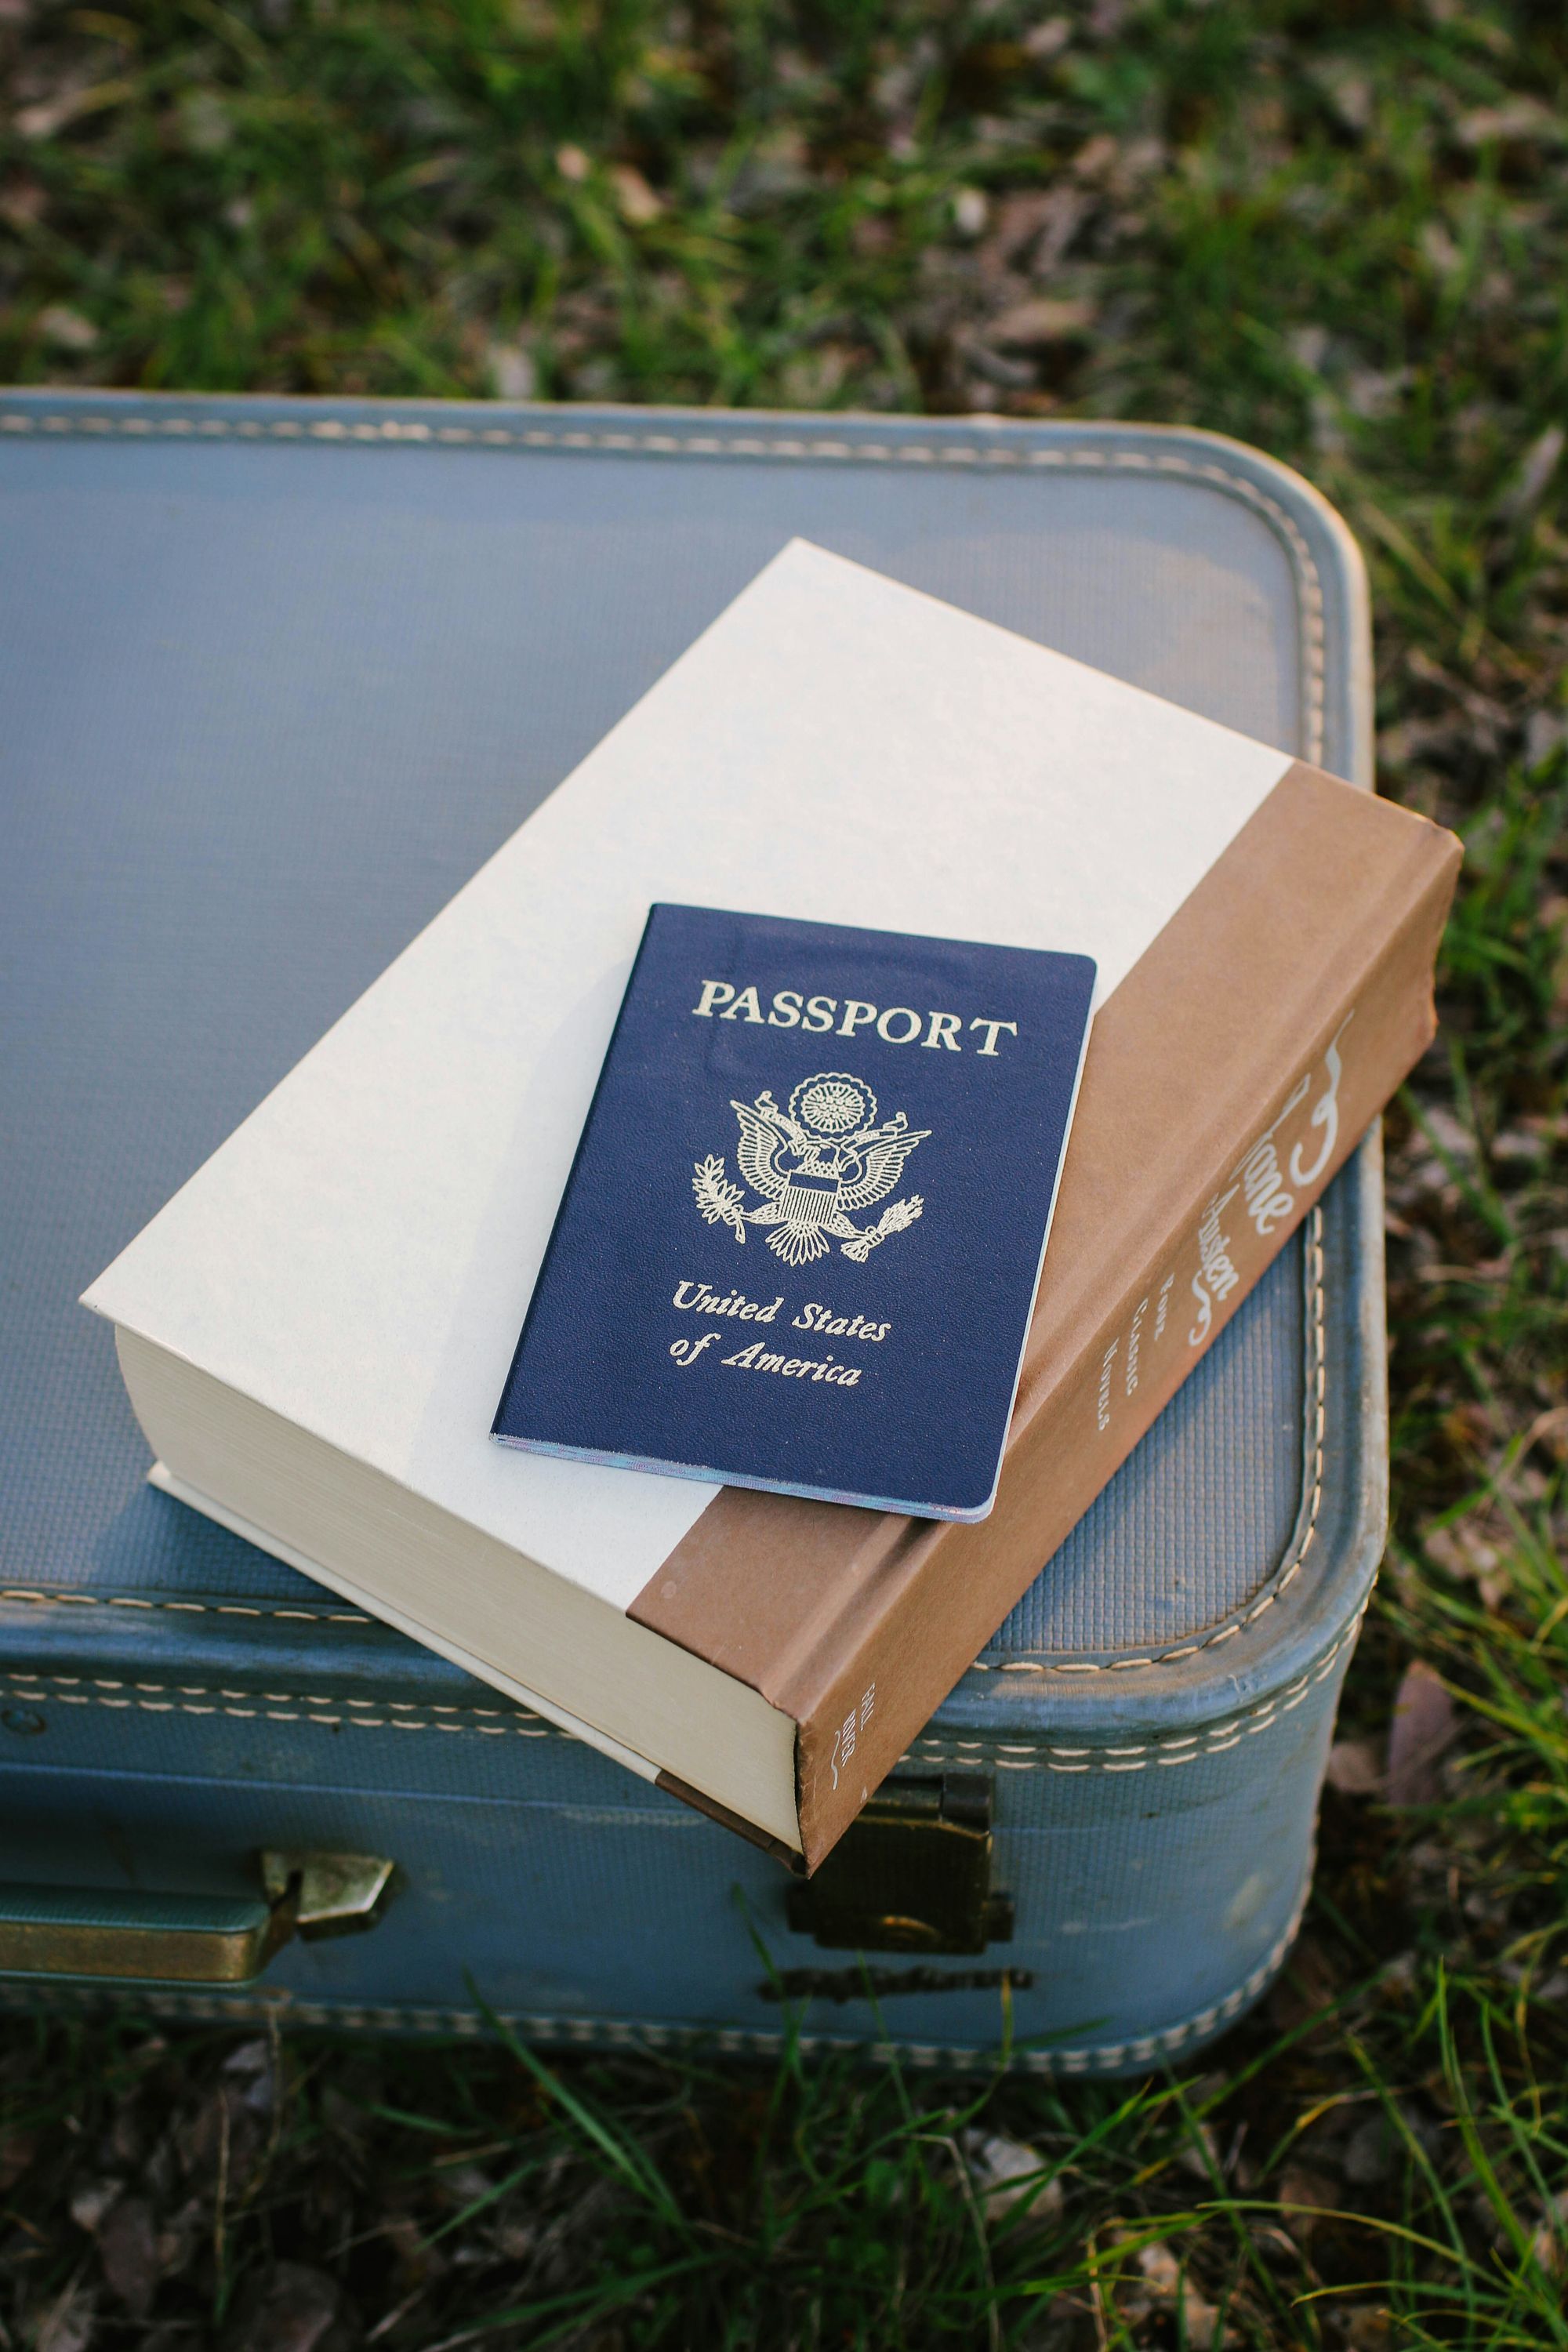
Think about it: A leading university in the US has just sent you their admission letter with the salutation "Congratulations!" Now, just as you might be bracing up for the honor coming your way, there lies an essential prerequisite so everything falls in place: filling out the DS 160 form.
While it might seem daunting, this form is simply your first step toward turning your American college dreams into reality. Yes, the DS 160 form is detailed, but don't worry—it's a manageable process.
This guide will walk you through each section with clear, step-by-step instructions that ease the process. With the correct information, you'll fill out the form that lays a foundation for your future success. Before we list the steps, let’s first understand the basics.
What is the DS 160 Form?
The DS 160 form is a comprehensive online application crucial for nonimmigrants seeking to study in the US. It's the first step in your visa application process and is your formal introduction to US immigration authorities, detailing your personal, educational, and travel background. This form must be completed accurately, as it forms the basis of your visa interview.
Who Should Fill Out the DS 160 Form? | Why is the DS 160 Form Important? | Documents Required for Completing the DS 160 Form |
|
|
|
For expert guidance through your visa application process, join our webinars led by seasoned professionals. Register now and enhance your chances of visa approval.
Detailed Step-by-Step DS 160 Form Filling Process
Here’s a step-by-step guide to filling out the DS 160 form. Each step includes detailed actions to ensure clarity and ease during application.
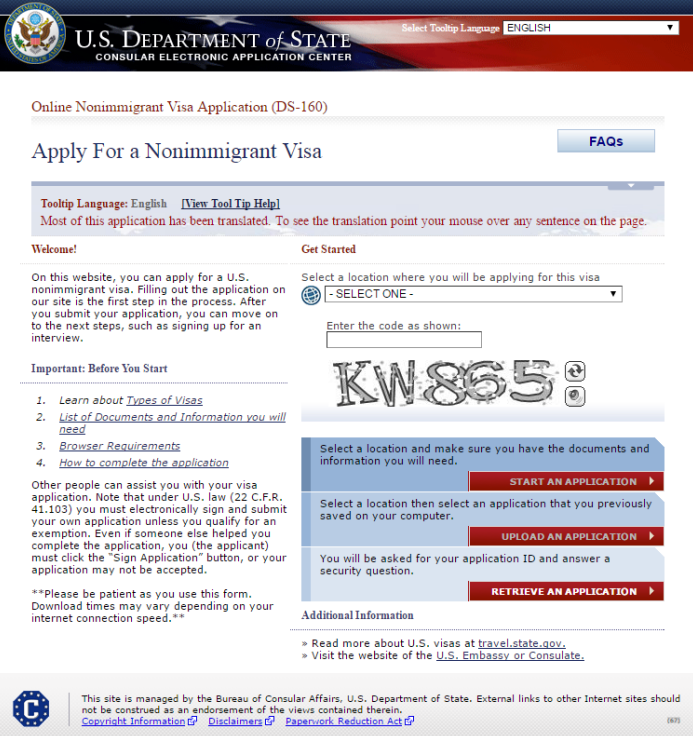
Step 1: Initiate Your Application
Begin the Process: Navigate to the Consular Electronic Application Center. Start your application by selecting "Start An Application." This initial step sets the groundwork for the detailed information you will provide, which is crucial for your visa processing.
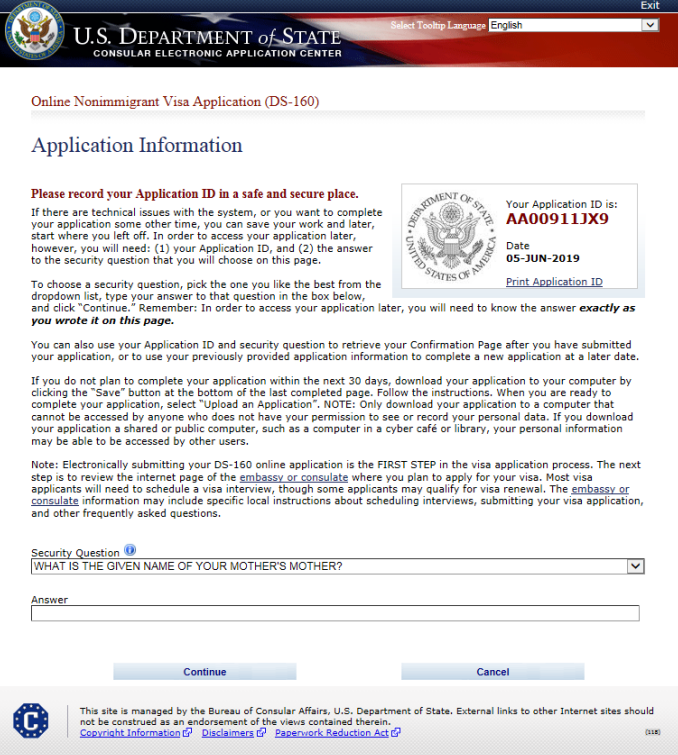
Step 2: Document Your Application ID
Secure Your Application ID: Once you start, the system will generate an Application ID. Note this ID down carefully and choose a security question. This ID is critical for accessing your form if you need to pause your application or retrieve it later due to an interruption.
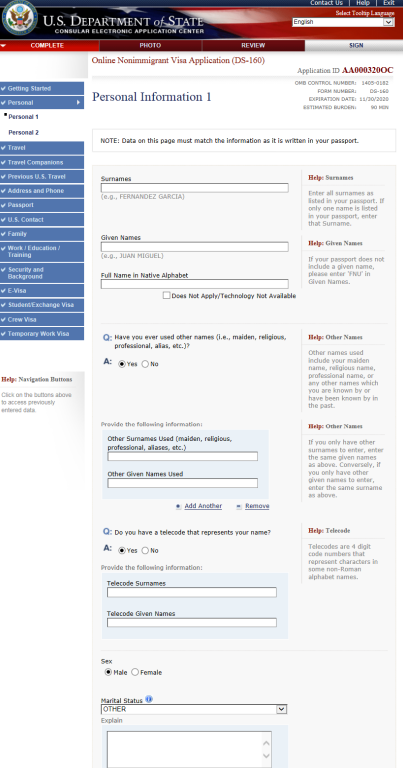
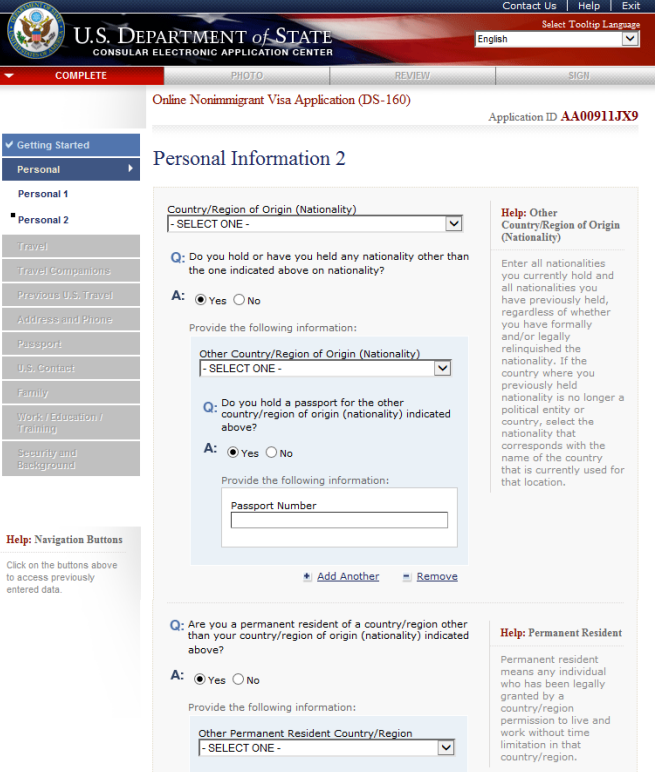
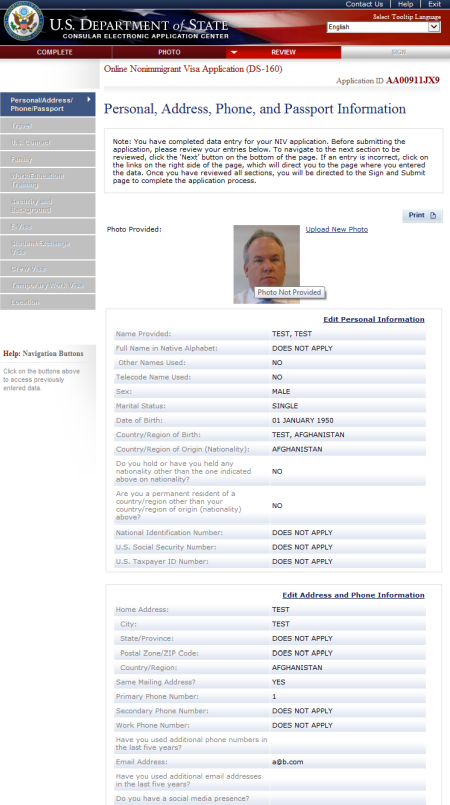
Step 3: Complete Personal Information Sections
Provide Detailed Personal Data: Fill in all required fields in Personal Information Sections 1 and 2. These sections will ask for your full legal name, date of birth, and other personal details. Accuracy here is crucial, as discrepancies can cause delays or issues with your visa process.
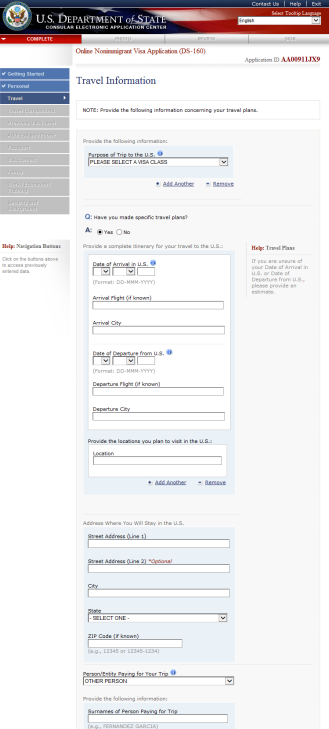
Step 4: Enter Your Travel Information
Detail Your Travel Plans: Specify your intended travel dates, the purpose of your trip, and details of your stay in the US. This section helps determine the type of visa you require and whether your intended activities align with visa regulations.
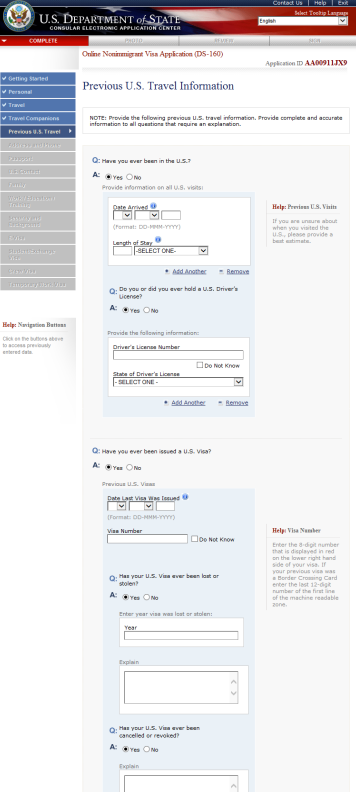
Step 5: Disclose Previous US Travels
Report Past US Visits: If applicable, provide details about your previous travels to the US. This includes dates of visits, purposes of the trips, and any visas you used for those travels. Honest disclosure is essential for transparency and trust in your application.
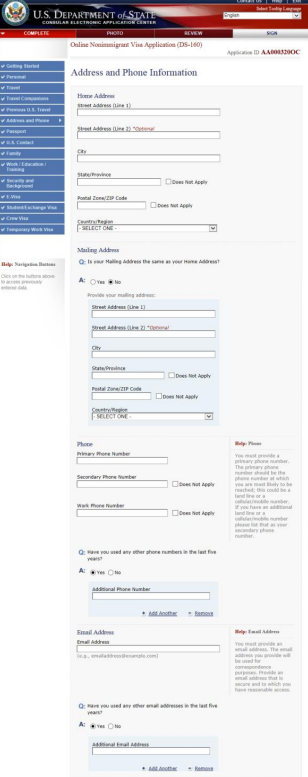
Step 6: Input Contact Details
List Your Contacts: Enter your current residential address, phone number, and email. Ensure these are up-to-date, as they may be used for official communications regarding your visa application.
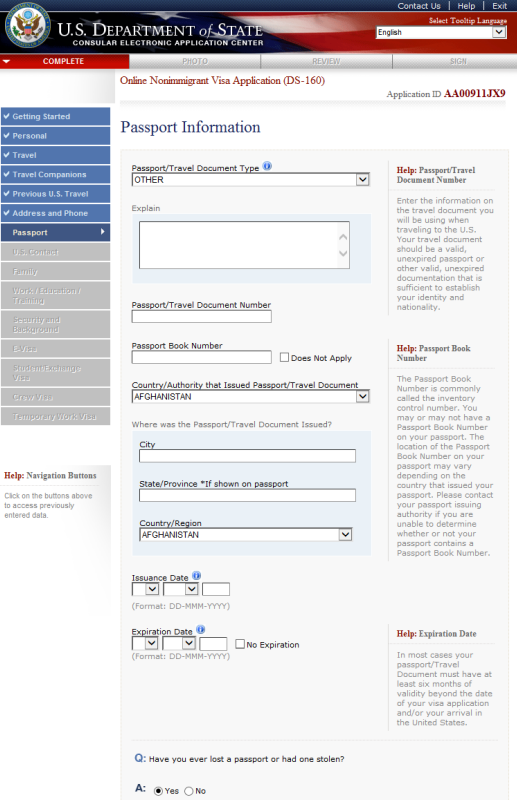
Step 7: Update Passport Information
Passport Data Entry: Input your passport number, country of issue, and expiration date. Ensure your passport is valid for at least six months beyond your planned stay in the US.
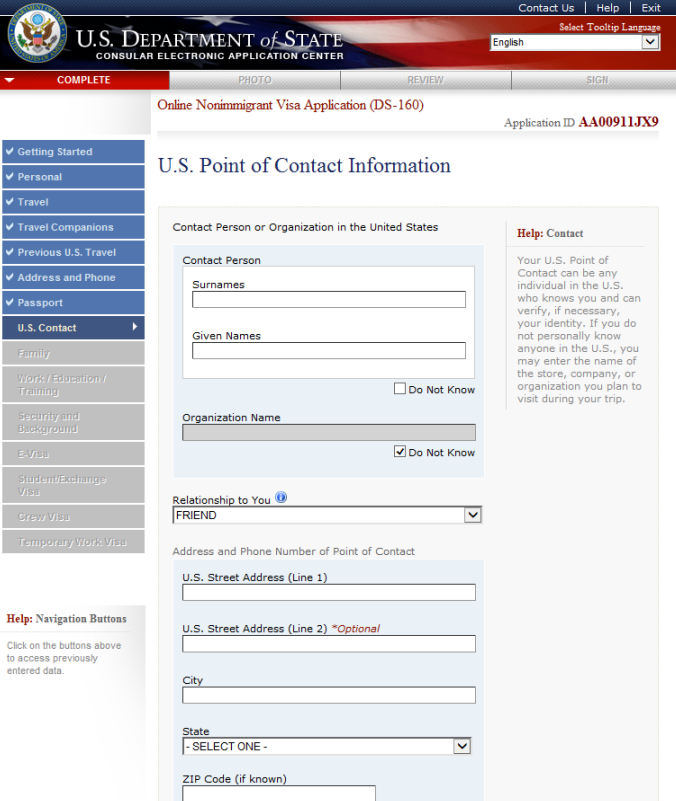
Step 8: Provide US Point of Contact Information
Identify a Local Contact: Input details of a contact in the US, such as a friend, family member, business associate, or educational institution. This person or entity might be contacted to verify information or in case of emergencies.
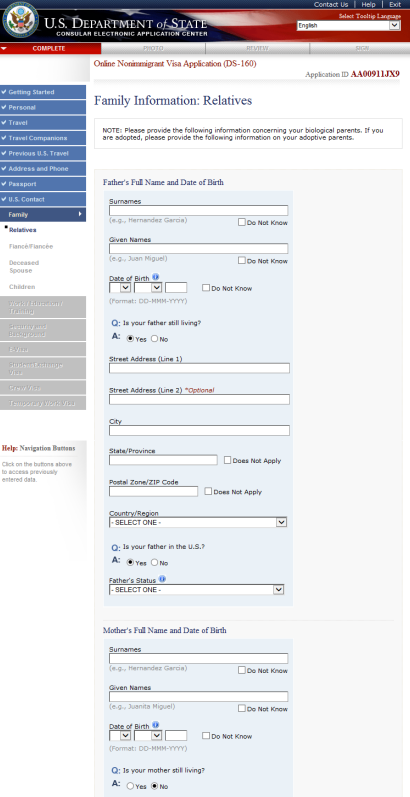
Step 9: Family Information
Family Background Details: Fill in information about your immediate family members, including relatives, partners, or a fiancé(e) if applicable. This may also include any dependents or former spouses if relevant to your application.
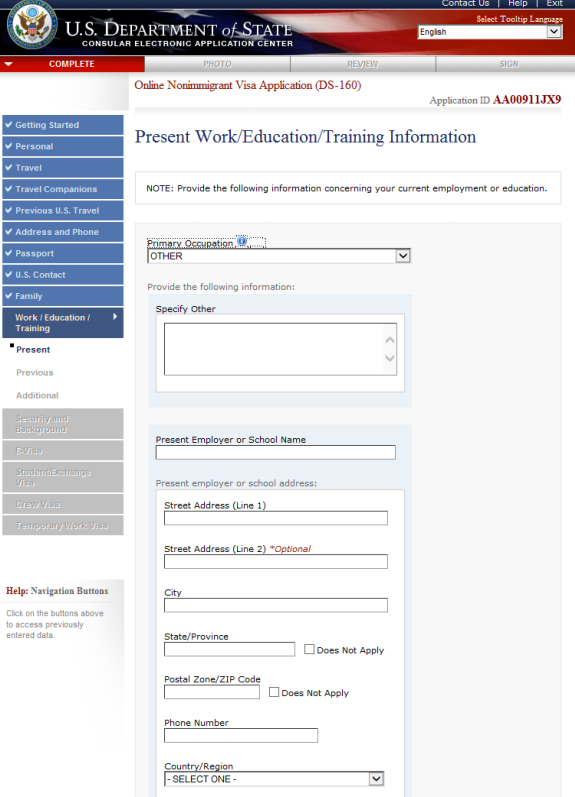
Step 10: Current Work/Education/Training Information
Educational and Employment Details: Provide details on current employment or educational institution. This includes your job title, company name, address, and any relevant training programs you're involved with.
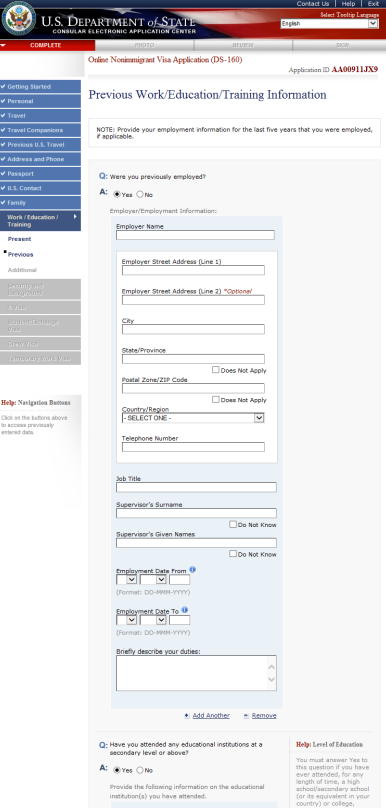
Step 11: Previous Work/Education/Training Information
Historical Professional and Educational Data: Document your past educational and professional experiences. This historical insight supports your visa category justification and helps establish your ties outside the US.
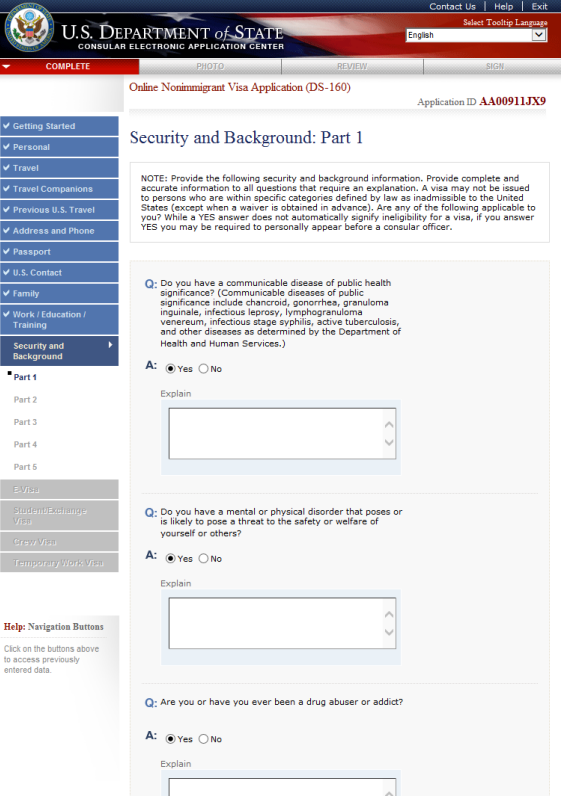
Step 12: Answer Security and Background Questions
Complete Security Screenings: Carefully answer all questions in the security and background sections. These questions are critical for assessing your admissibility and meeting national security standards.
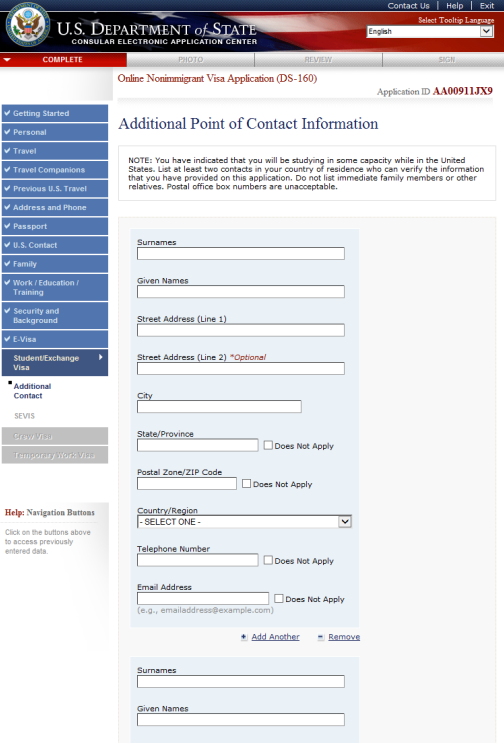
Step 13: Additional Points of Contact
Additional References: Include additional contacts who can verify your identity and personal history. These might be professional or personal references that must be listed in previous sections.
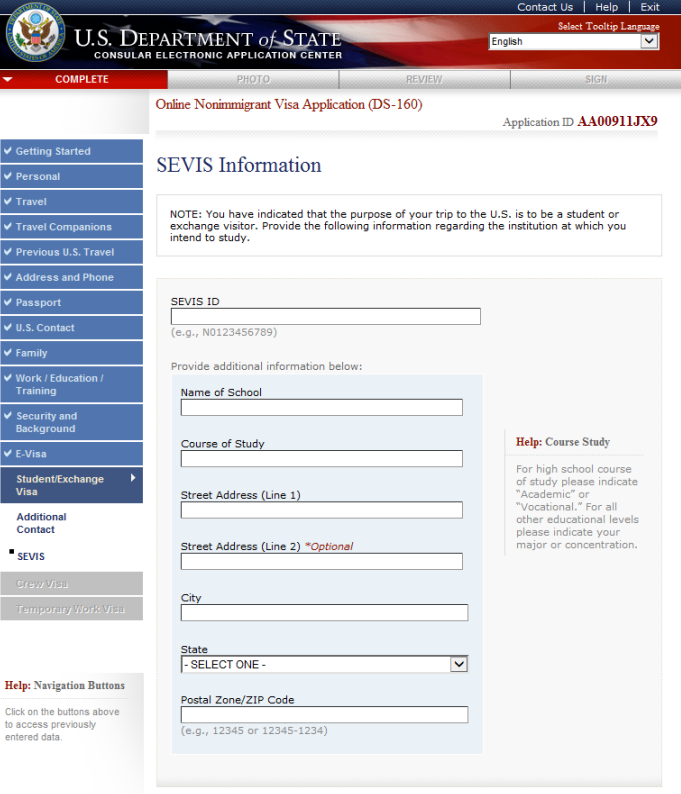
Step 14: SEVIS Information (For Student Visas)
Student Exchange Visitor Information: For F, M, and J visas, provide your SEVIS ID and the associated fee information. It is mandatory for all students and exchange visitors to verify their enrollment in the Student and Exchange Visitor Program (SEVP).
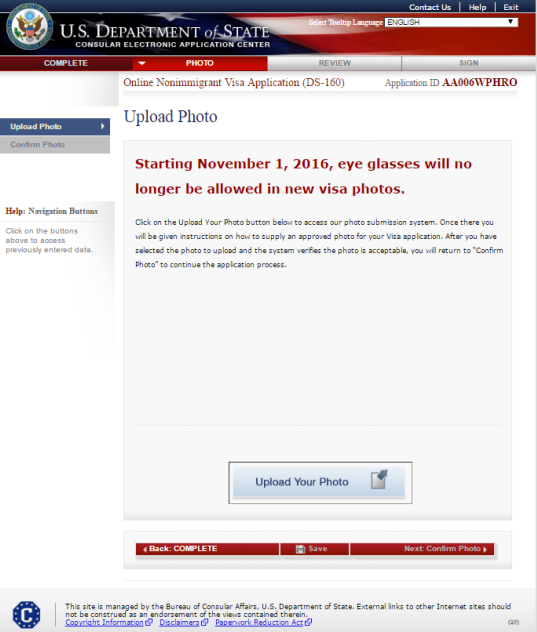
Step 15: Upload Your Photograph
Photo Upload: Attach a digital photograph that meets the specific requirements of the US State Department. This photo should be a recent, color photograph of you facing forward.
Step 16: Review and Submit Your Application
Final Review and Submission: Carefully review all information for accuracy and completeness. Once verified, submit your application electronically and keep a copy of the confirmation page for your records.
Following the detailed steps for filling out the DS 160 form, here are some quick tips to keep in mind to ensure a smooth application process:
Quick tips | Keep these in mind while filling out the DS 160 form |
Double-check information | Verify all details for accuracy before submission to avoid delays. |
Save frequently | Regularly save your progress to avoid losing data in case of technical issues. |
Prepare documents | Have all necessary documents on hand before starting to streamline the process. |
Understand visa type | Clearly understand the type of visa you are applying for to provide relevant information. |
Answer honestly | Provide truthful answers in the security and background sections to avoid complications. |
Follow photo guidelines | Ensure your uploaded photo meets all specified requirements. |
Keep records | Save a copy of the confirmation page and any other relevant documentation for your records. |
After Submission: What Next?
After submitting the DS 160, the next step is to schedule your visa interview at the nearest US location: the embassy or consulate. Prepare by reviewing typical interview questions and organizing all necessary documents, including the DS 160 confirmation page.
Conclusion
Completing the DS 160 form is your first step towards studying in the US. If you find the process daunting, Zolve offers comprehensive DS 160 assistance. Their services include expert form reviews, personalized form-filling support, and access to expert-led webinars designed to ensure visa success. Engage with Zolve today to make your visa application process as smooth as possible, and take your first confident step.
FAQs
Q. How can I fill out the DS 160 form in India?
You can complete the DS 160 form in India by accessing the Consular Electronic Application Center (CEAC) website. Start a new application, follow the prompts, and ensure all required information is accurately filled.
Q. Is it difficult to fill DS 160 form?
Filling out the DS 160 form can be straightforward if you have all the necessary information. The form is detailed, so careful attention to the instructions and accuracy in providing information is crucial.
Q. How much is the fee for the DS 160 form?
The fee for the DS 160 form is generally $160 for most nonimmigrant visas. This fee can vary for certain types of visas, so it’s important to check the specific fee for the visa category you are applying for.
Q. What to do next after submitting DS 160?
After submitting your DS 160 form, the following steps include printing the confirmation page with the barcode. You need this confirmation page to schedule your visa interview at the US Embassy or Consulate.
Q. How do I know if my DS 160 is approved?
You won’t receive direct approval for submitting the DS 160 form alone. After submitting, you must schedule and attend a visa interview at a US Embassy or Consulate. The approval of your visa will be determined based on the interview and the documents you provide there.
Disclaimer: The products, services, and offerings mentioned in this blog are subject to change and may vary over time.
We recommend reviewing the Cardholder Agreement during the credit card and bank account creation process